Hopper – User Manual
Converts and compresses images, videos, and PDFs. Hop in, hop out.
Fast, simple, local. No cloud, no subscription.
What is Hopper?
Hopper is a macOS app for compressing, converting, and shrinking videos, images, and PDFs – right on your Mac, without cloud, without subscription. Drop in your files, click “Convert All”, done. Hop in, hop out.
The thumbnail in the file list is clickable and opens a Quick Look preview, just like in Finder.
Supported File Types
→ MP4, MOV, MKV, WebM, GIF
→ JPEG, WebP, AVIF
Quality reduction & compression
Basic Usage
Getting Started
On first launch, it's a good idea to configure the basic settings (⌘, or menu Hopper → Settings) once before dragging any files into Hopper. The settings determine which format to convert to, what quality to use, whether originals are kept, whether images are scaled, and where converted files are saved.
These settings – also explained in detail below – apply automatically to all files subsequently added to the list, both in normal operation and for the watched folder. Individual files in the list can be adjusted at any time without changing the global settings.
For the watched folder, it is especially important to set both the input and output folders after activating it. Hopper only starts watching once the settings window is closed.
Adding Files
There are several ways to add files to Hopper:
| Drag & Drop into the window | Drag files or folders directly into the main window. Unsupported formats are ignored. | |
| Drag & Drop onto the Dock icon | Hopper opens and immediately adds the files. | |
| Choose Files … | Clicking the button opens a file dialog for manual selection. | |
| Finder Context Menu | Right-click on a file/folder → Services → Open in Hopper. | |
| Add more files | Possible at any time; new files are appended to the existing list. |
The Open in Hopper service can be assigned a custom keyboard shortcut in System Settings under Keyboard → Keyboard Shortcuts → Services.
Got many files and folders? Just drag them all in at once. Settings apply to all files of the respective category.
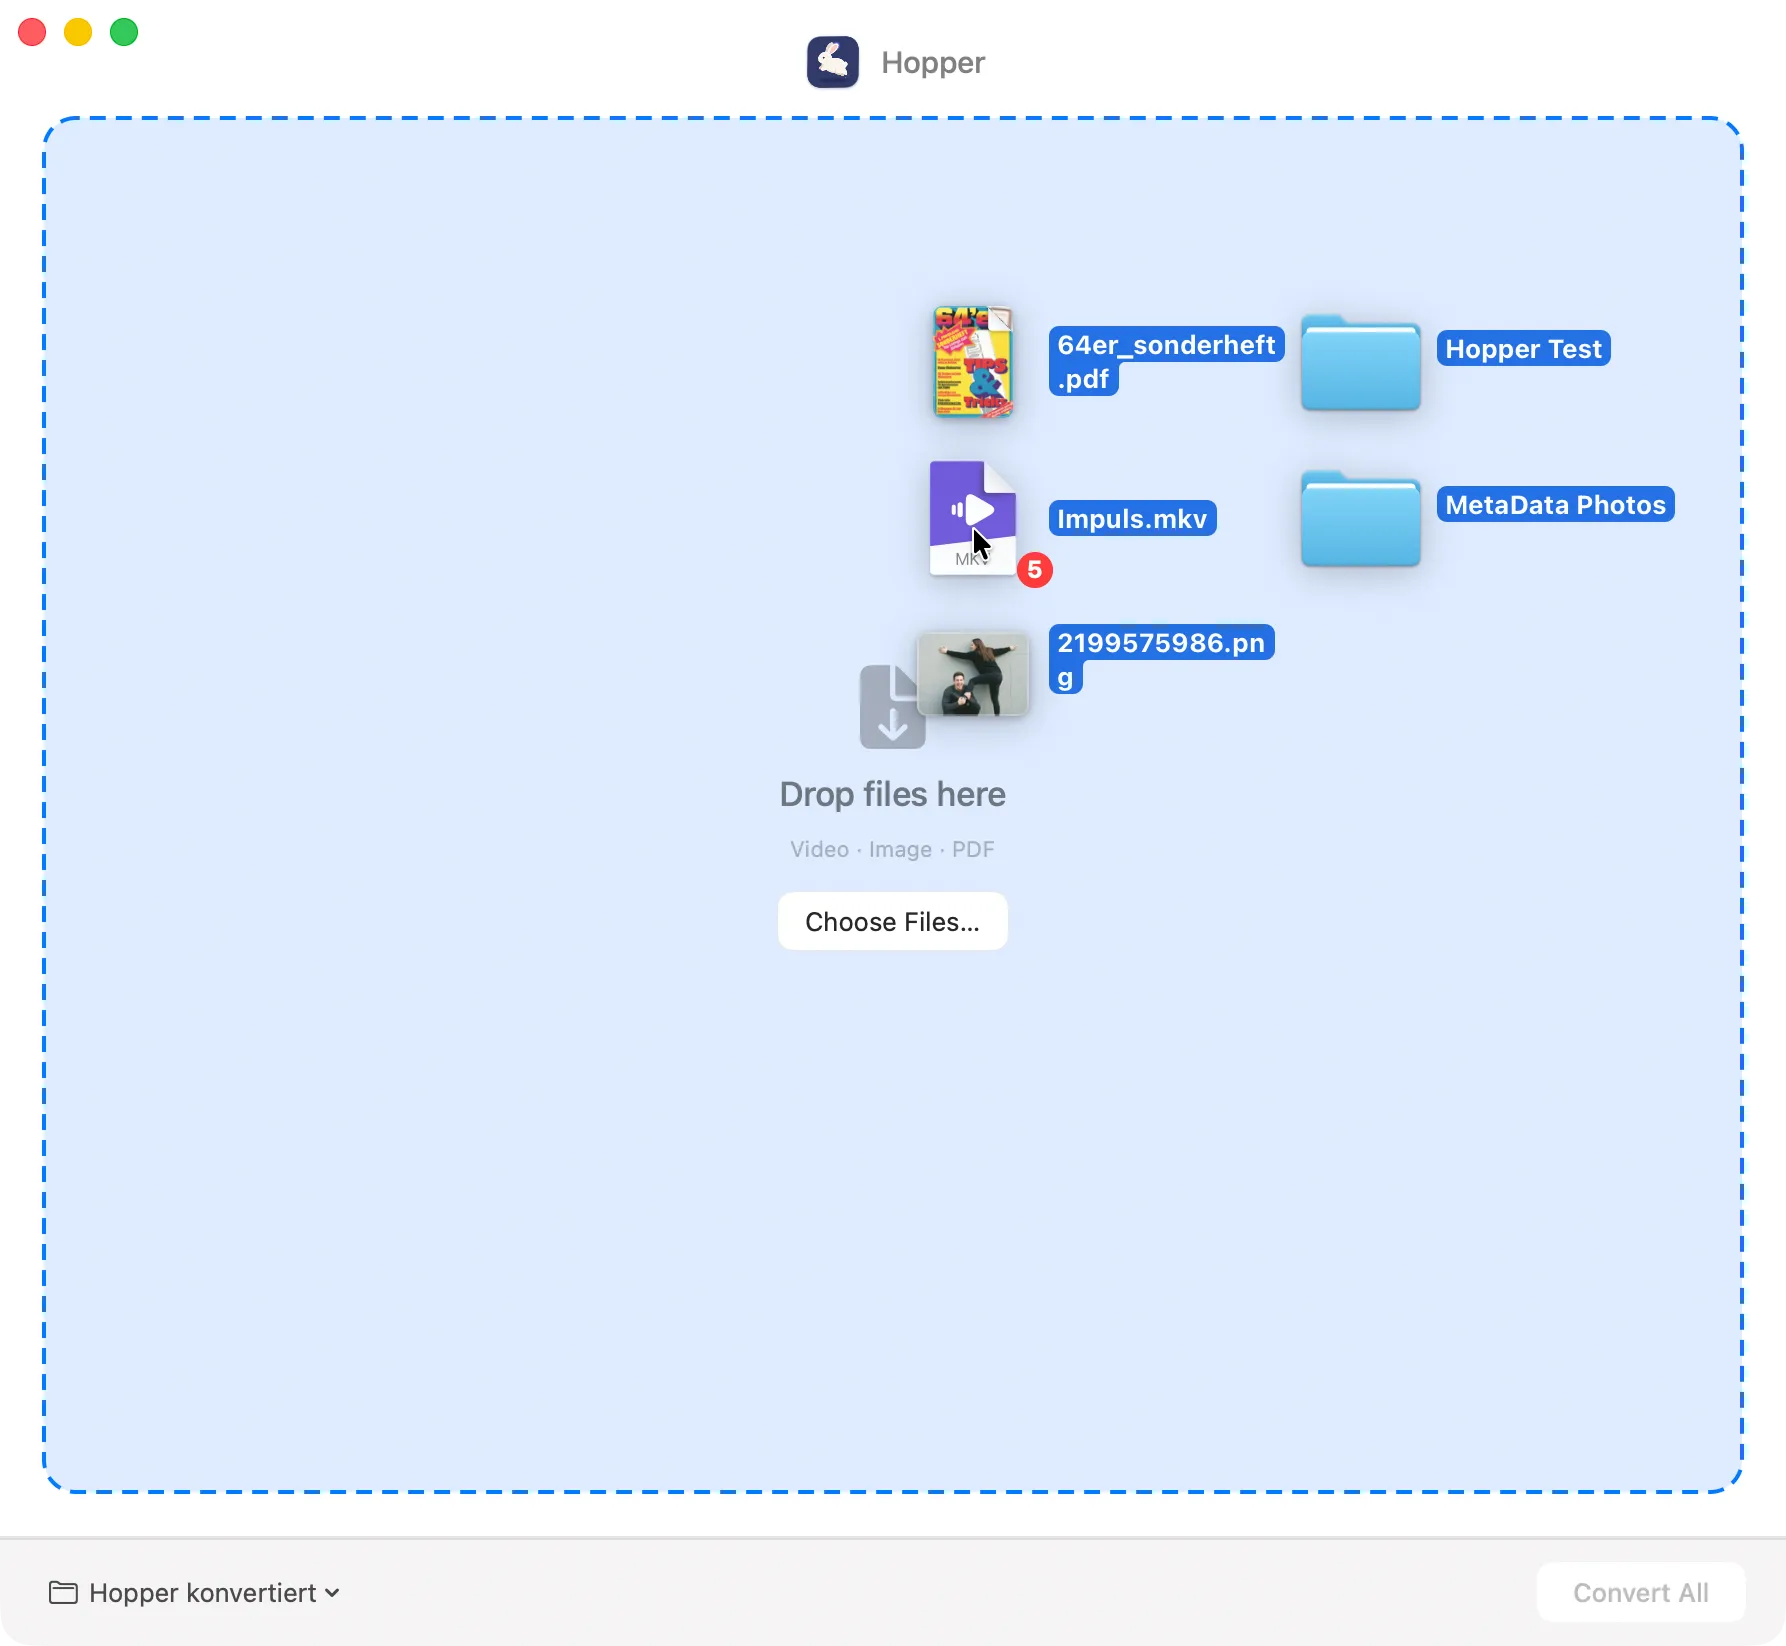
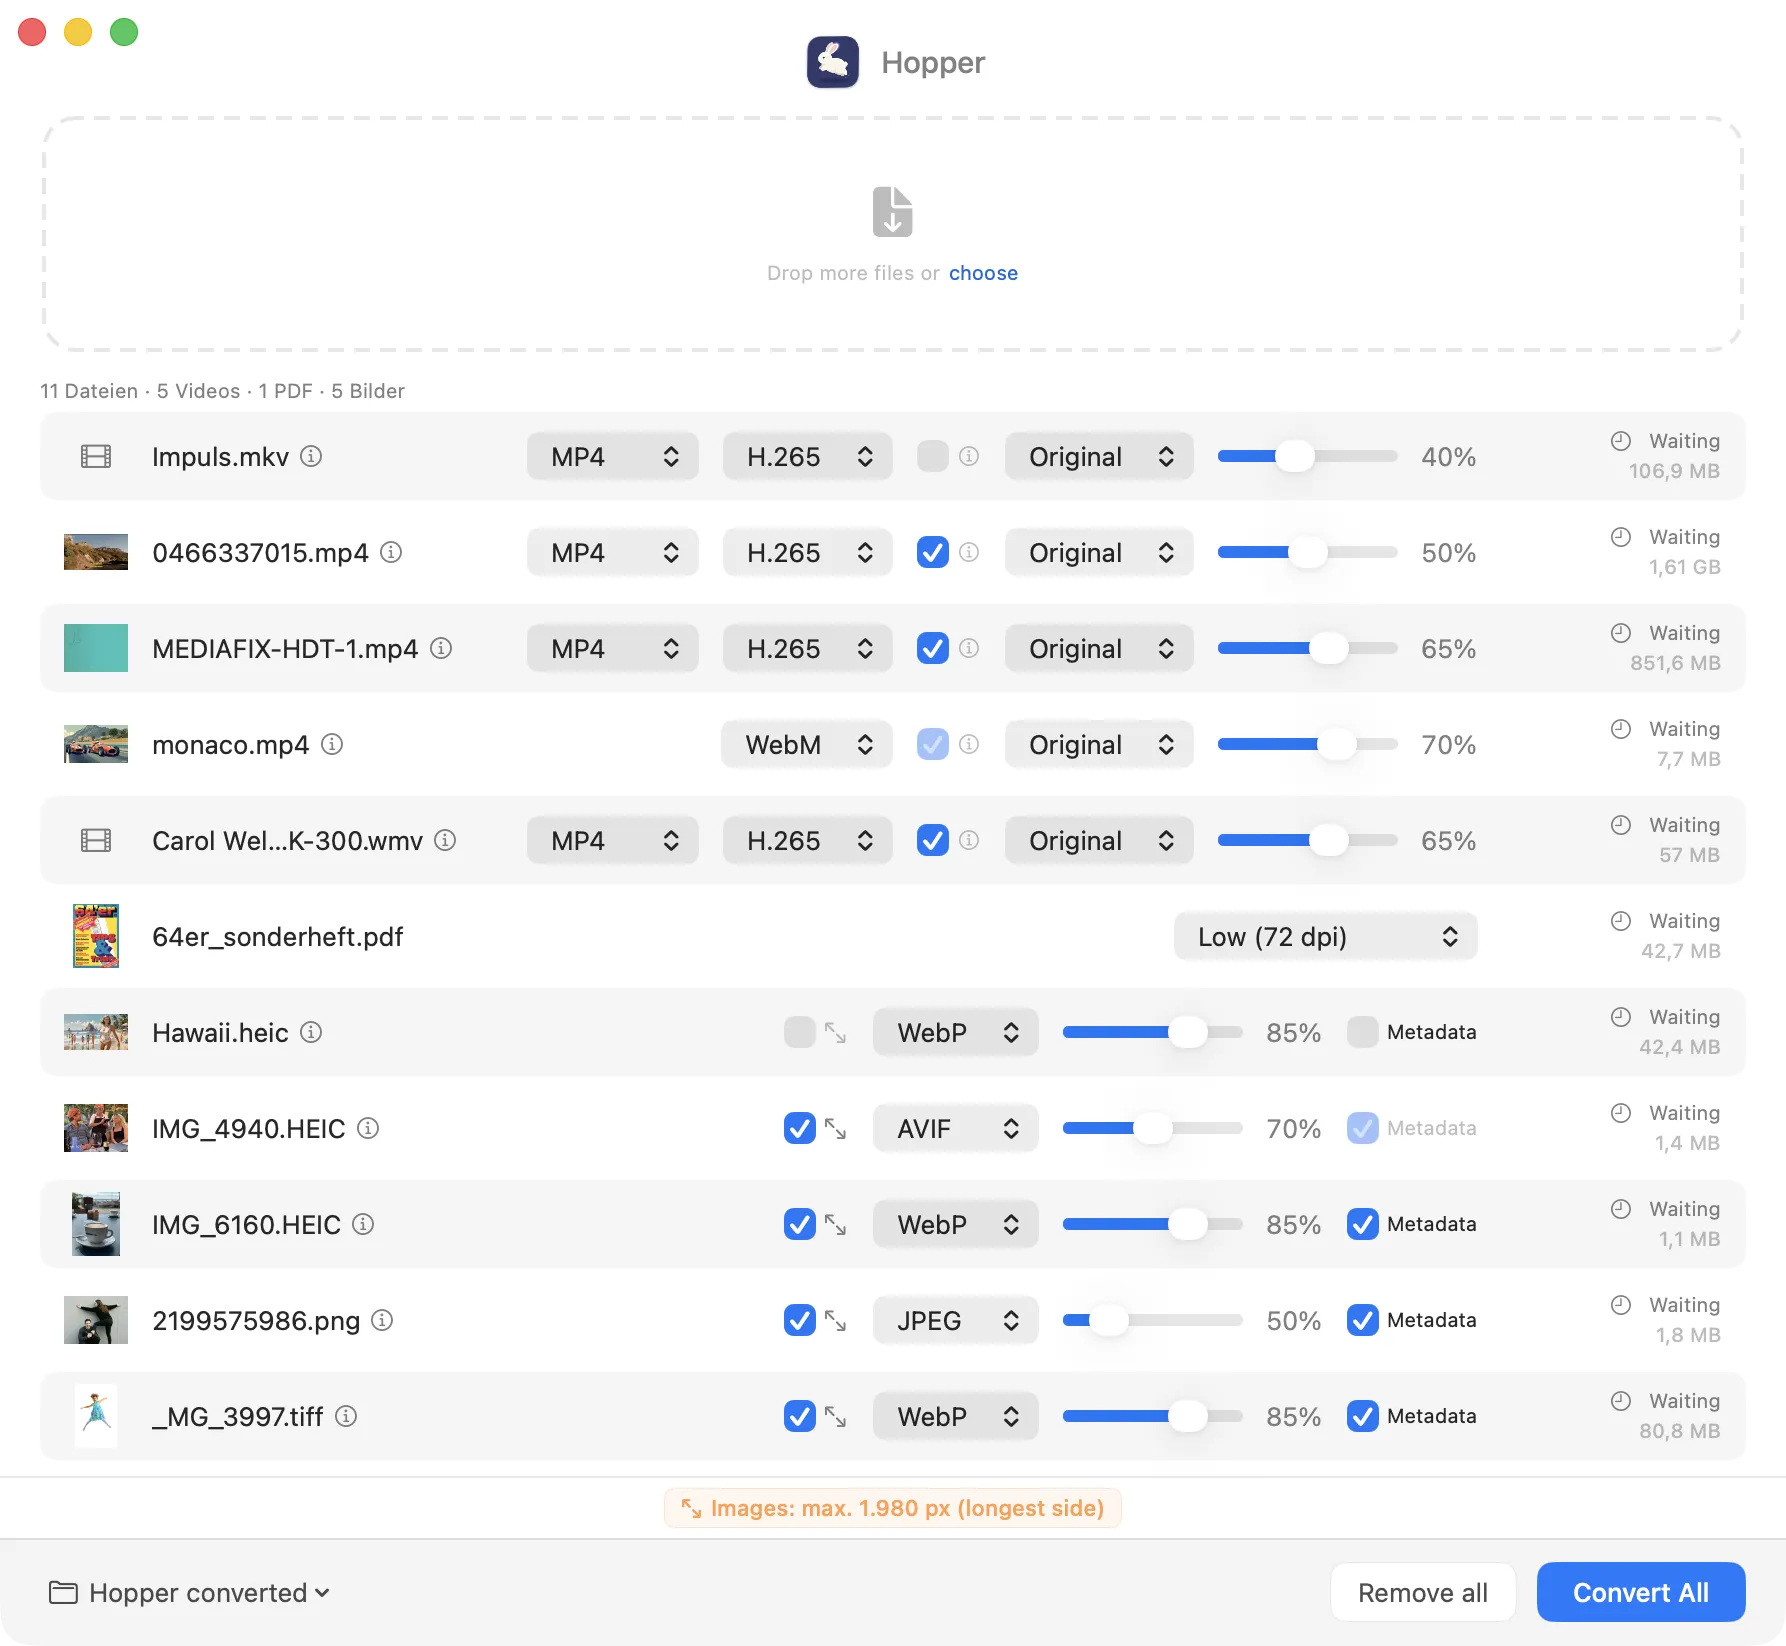
After adding files, the list is sorted automatically: videos on top, then PDFs, then images. The sort order can be changed at any time.
The default settings from Preferences are applied automatically to all files – individual adjustments can be made directly in the file list at any time.
File Info
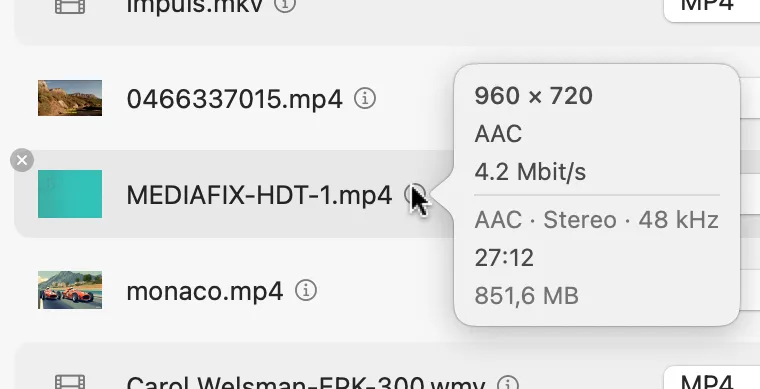
Hovering over the ⓘ icon of a video or image shows additional info. For a video: resolution, codec, frame rate, bit rate, audio, duration, and size. For an image: resolution, DPI, color space, and size.
Clicking on the thumbnail opens a preview (for formats supported by macOS).
Converting
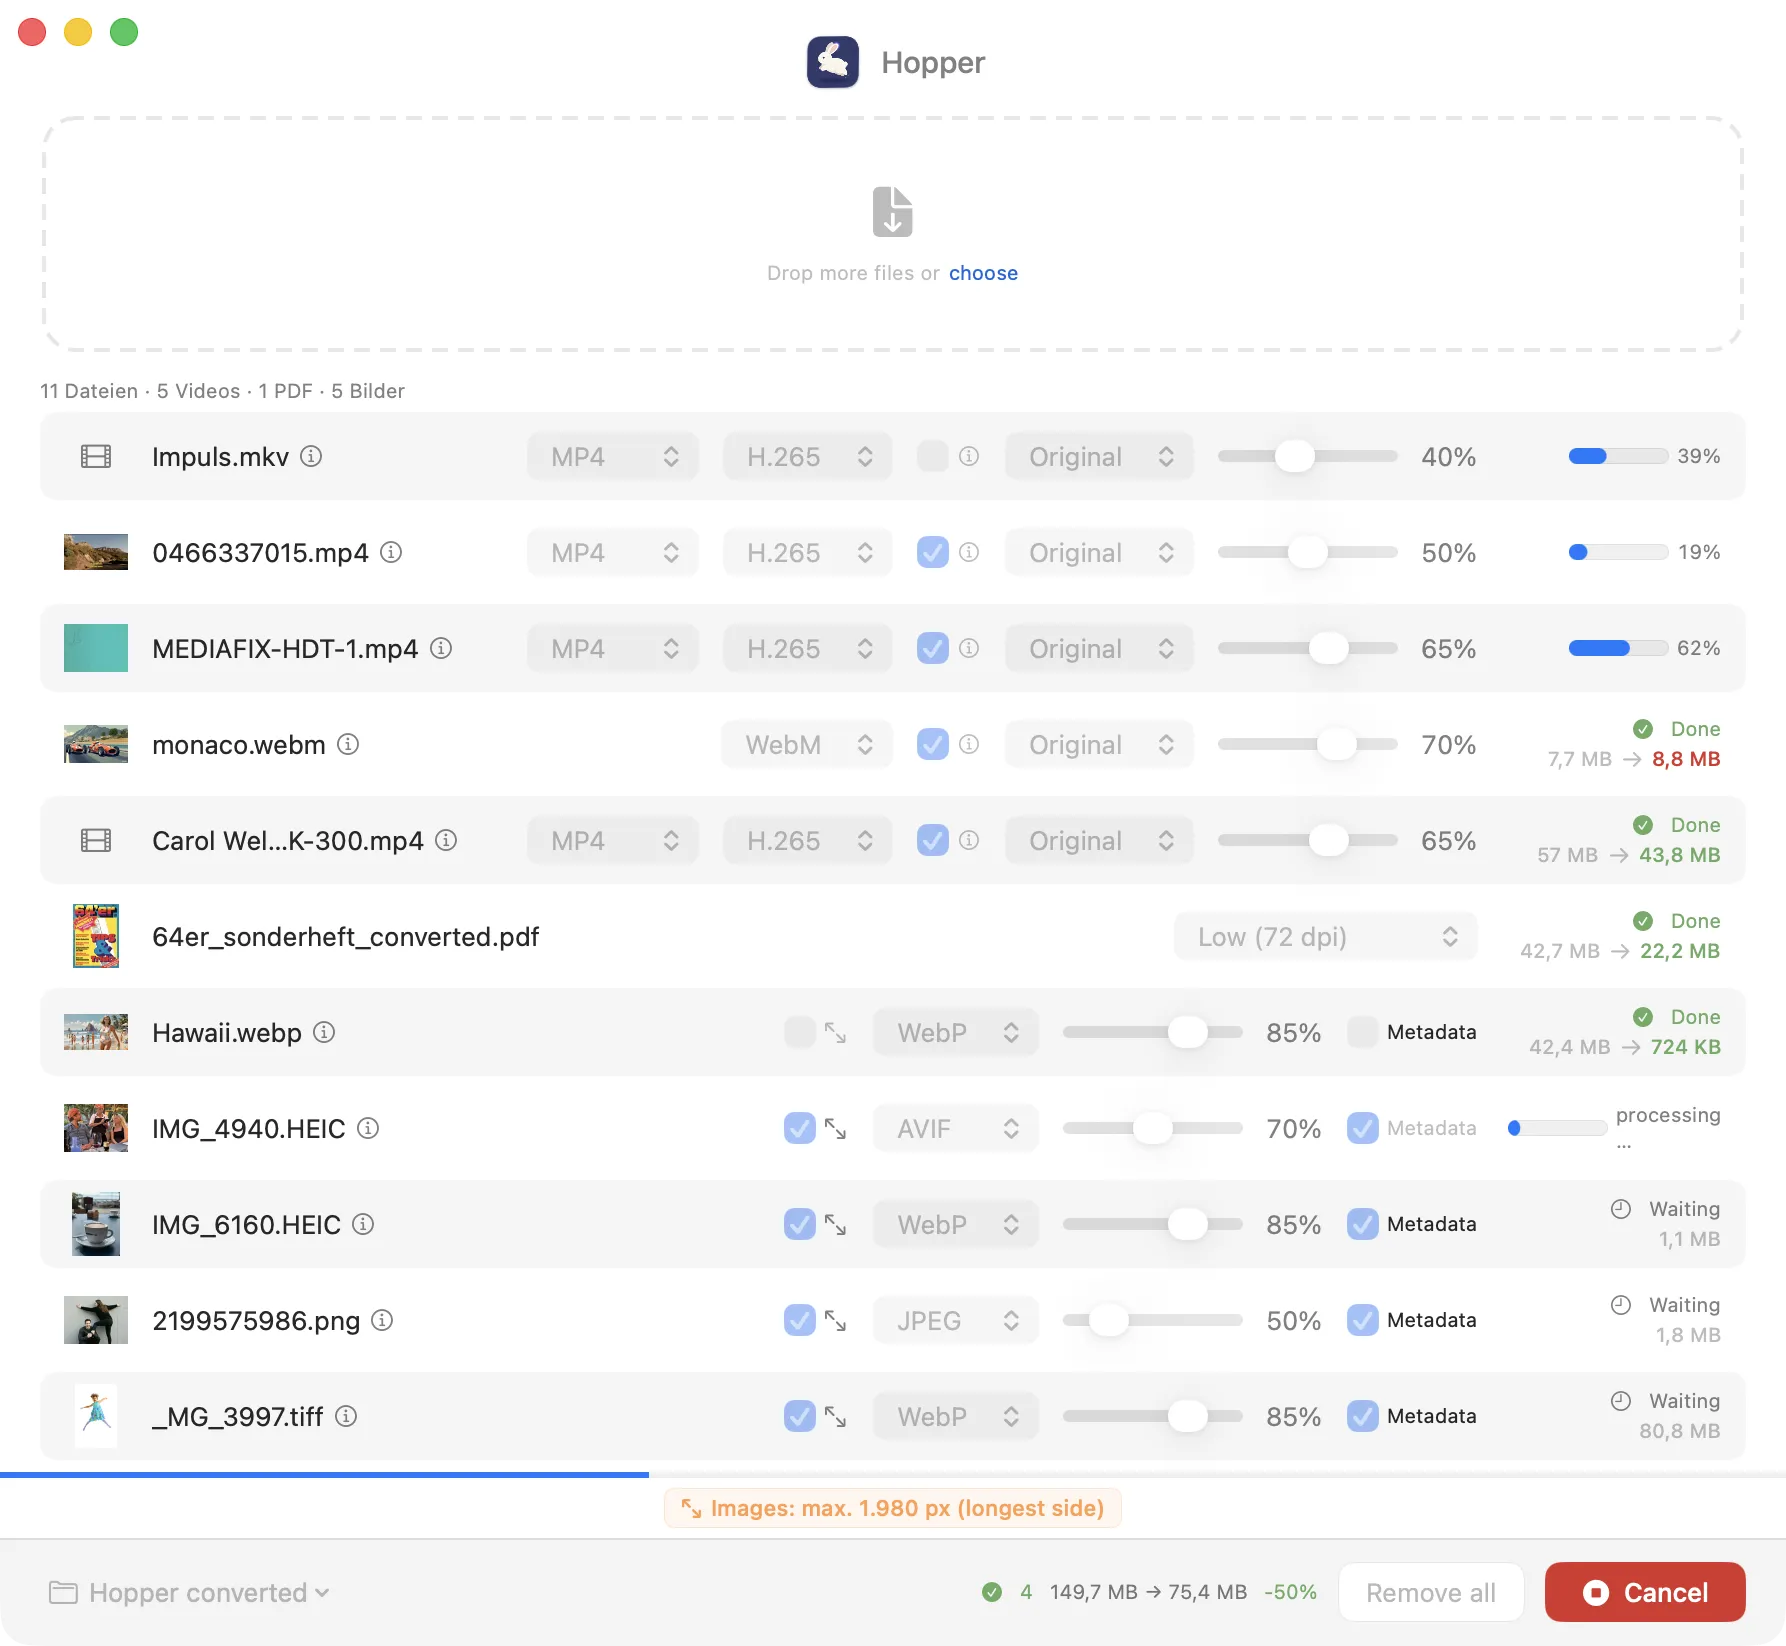
Click Convert All to process all files. The progress of each file is shown inline; a blue bar directly above the status bar shows the overall progress of all files.
Notice Badges
Directly above the status bar, Hopper displays colored notice badges when certain settings are active that could easily be overlooked:
| Originals will be deleted | Source files will be permanently deleted after successful conversion. | |
| Images: max. X px | Images in the list will be scaled to the specified size before conversion. |
Clicking a badge opens Settings directly on the corresponding tab.
Status Indicators
While a conversion is running, it can be stopped with Cancel. Already completed files are kept.
Cancelled or failed conversions can be retried by clicking “Convert” again – without having to re-add the files.
Results & Savings
After successful conversion, the list entries show the name of the converted file. “Show in Finder” and “Preview” in the context menu then open the converted file – particularly useful in combination with “Delete originals”.
Failed files are automatically moved to the top of the list, so errors are immediately visible without having to search through a long list.
The status bar at the bottom of the window shows a summary of all converted files at a glance. For each individual file, the before and after sizes are displayed directly in the row to the right of the filename.

Total Savings in the Status Bar
After completion, the status bar shows the totals for all files: count, total size before and after, and the percentage savings in green – or red if files have grown on average.
Per-File Results
In the file list, each row shows the size before and after conversion on the right. If a file grows larger, the after-size is displayed in red.
If a file becomes larger after conversion, the after-size is shown in red – this can happen with already well-compressed files or an unfavorable codec combination.
Right-click on a completed file to show it in Finder directly from the context menu.
When converted files are in the list, the “Remove All” button changes to “Remove completed” when the Alt key is held (when either all or none are selected).
Multiple Selection
Context Menu (Right-click)
For a single unselected file or exactly one selected file:
| Convert | Convert this file | |
| Re-convert | Reset status to Waiting | |
| Show in Finder | Highlight file in Finder | |
| Preview | Open Quick Look preview (also by clicking the thumbnail) | |
| Remove from list | Remove the file from the list |
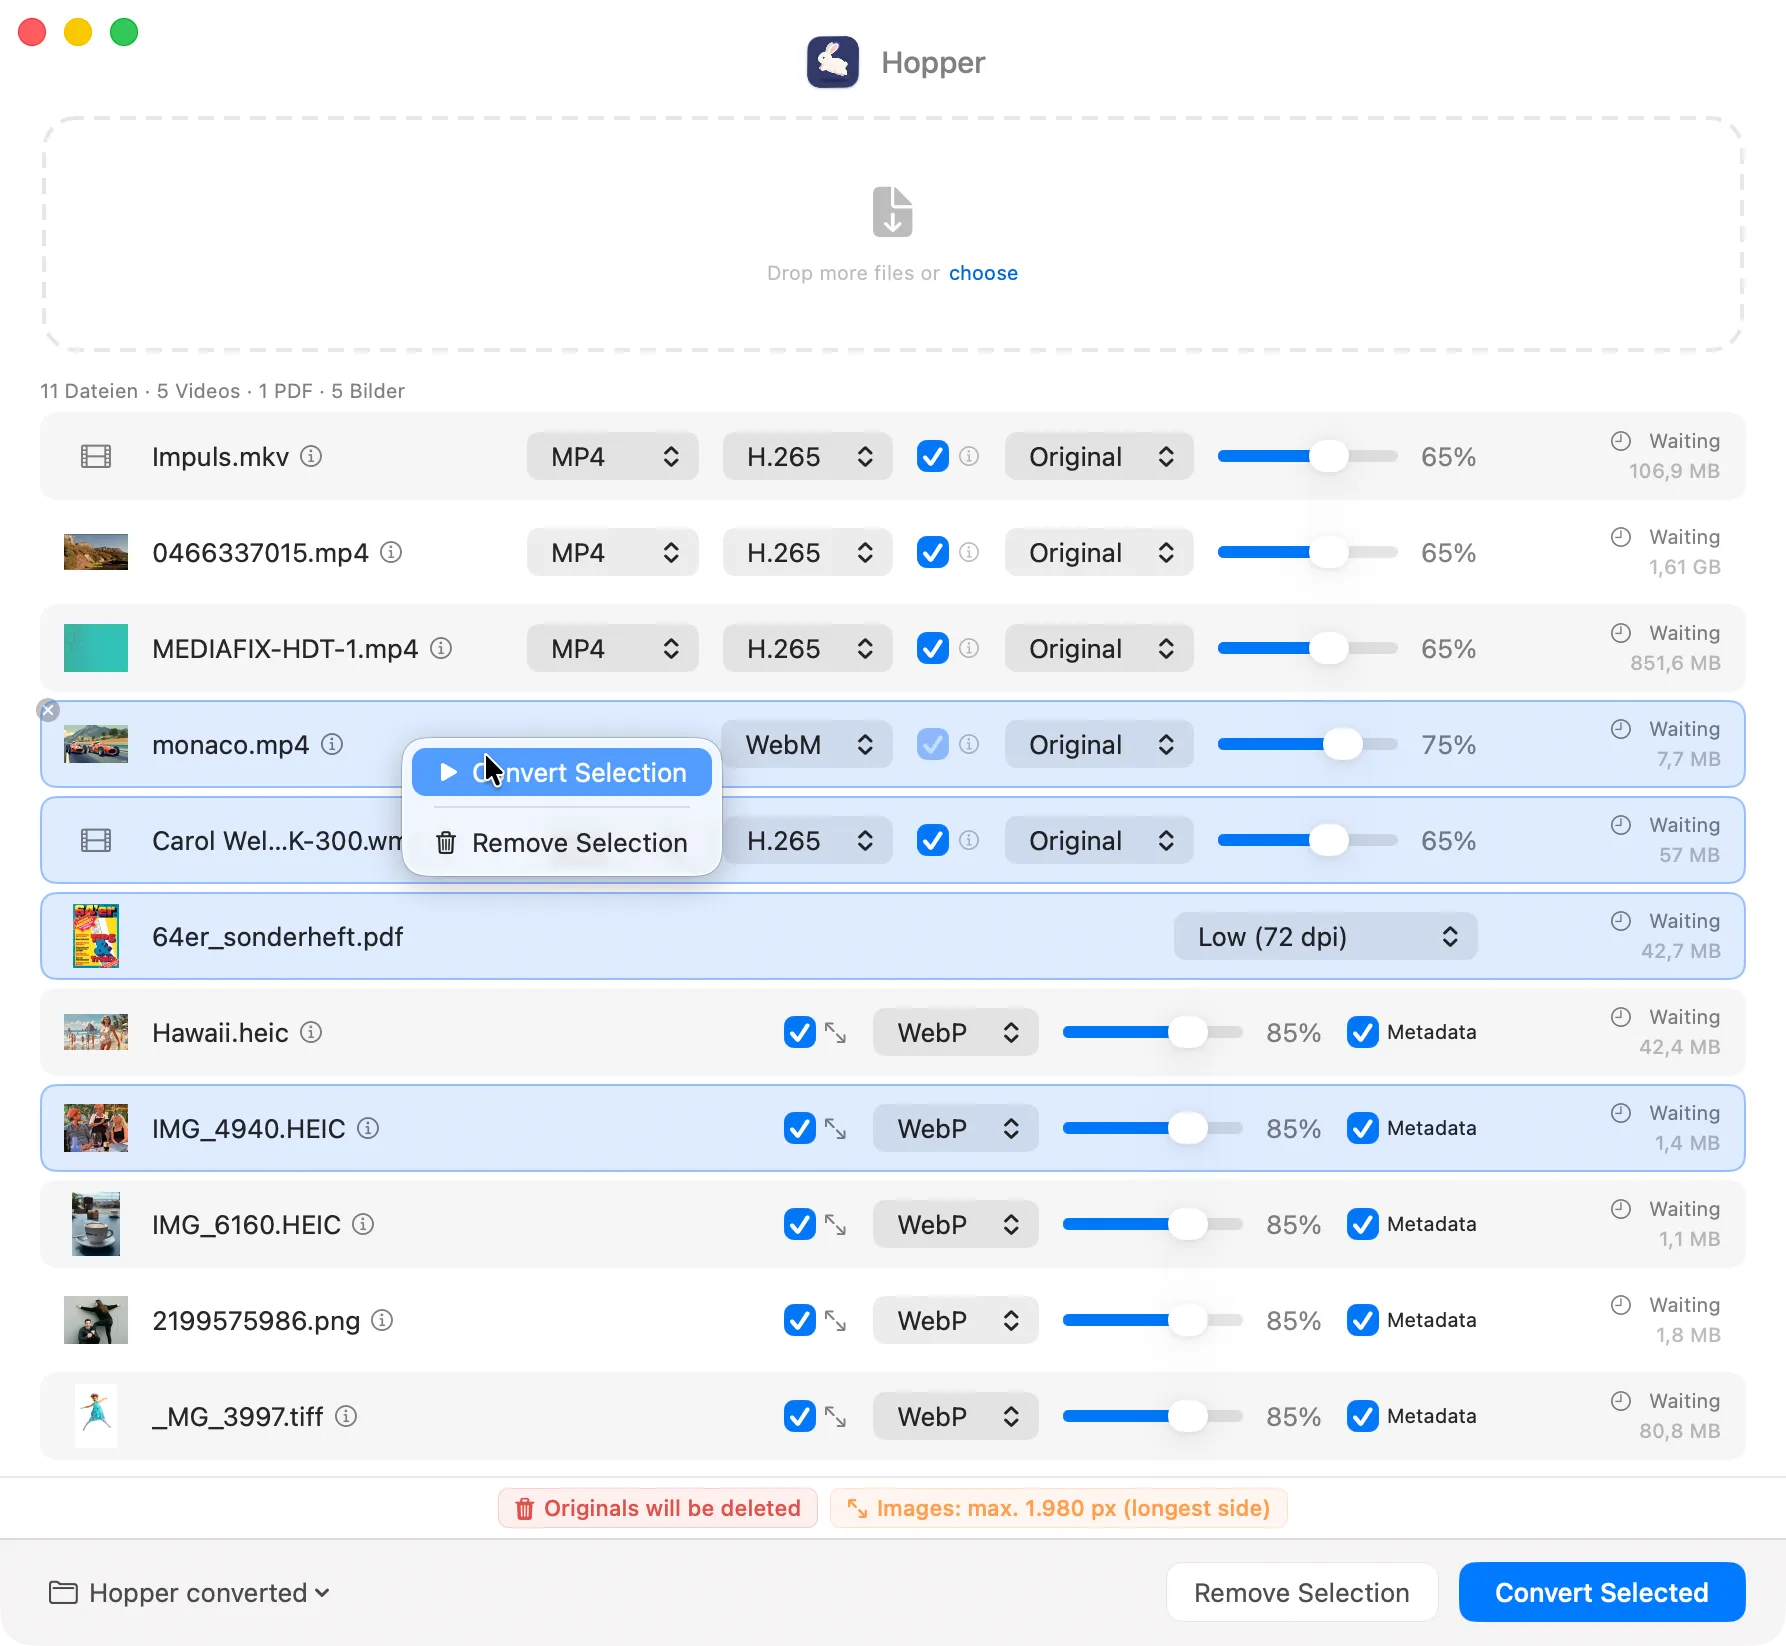
For multiple selected files:
| Convert selection | Convert only the selected files | |
| Re-convert selection | Reset status of all selected to Waiting (only if at least one is done) | |
| Remove selection | Remove selected files from the list (also with ⌫) |
Sorting
The file list can be sorted via the Sort menu or keyboard shortcuts:
The active sort criterion is marked with a checkmark ✓ in the menu. On the first drop into an empty list, Hopper automatically sorts by type.
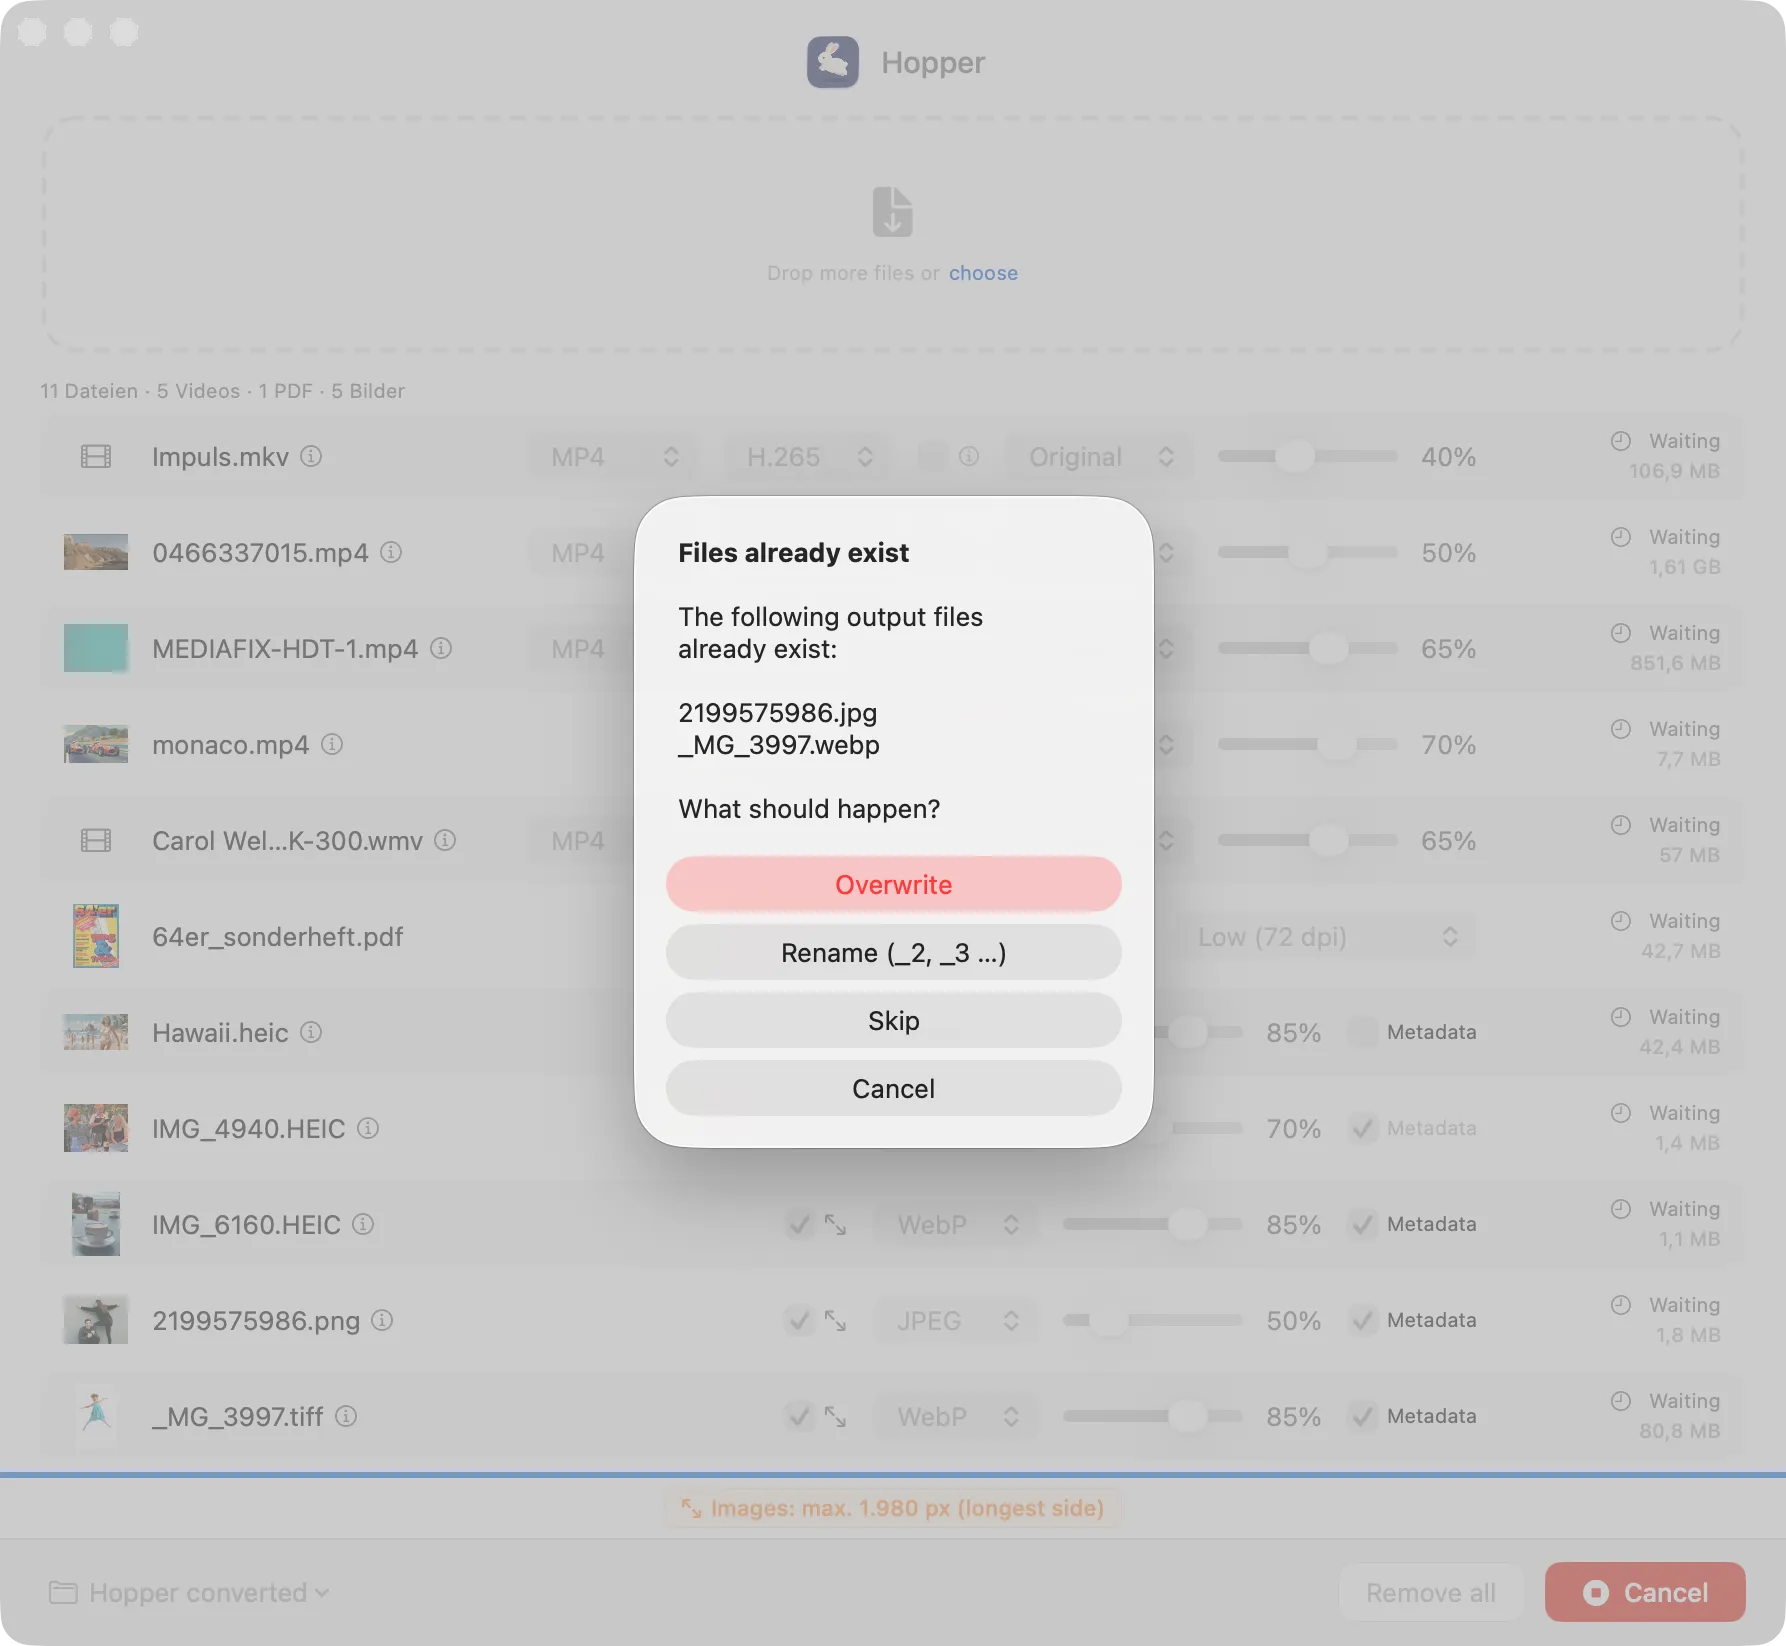
Resolving Conflicts
If a target file already exists, a dialog appears:
| Overwrite | The existing file is replaced | |
| Rename | (_2, _3 …) – The new file gets a number suffix | |
| Skip | The files are skipped | |
| Cancel | The entire conversion is stopped |
Settings
Access Settings via ⌘, or the menu Hopper → Settings.
General
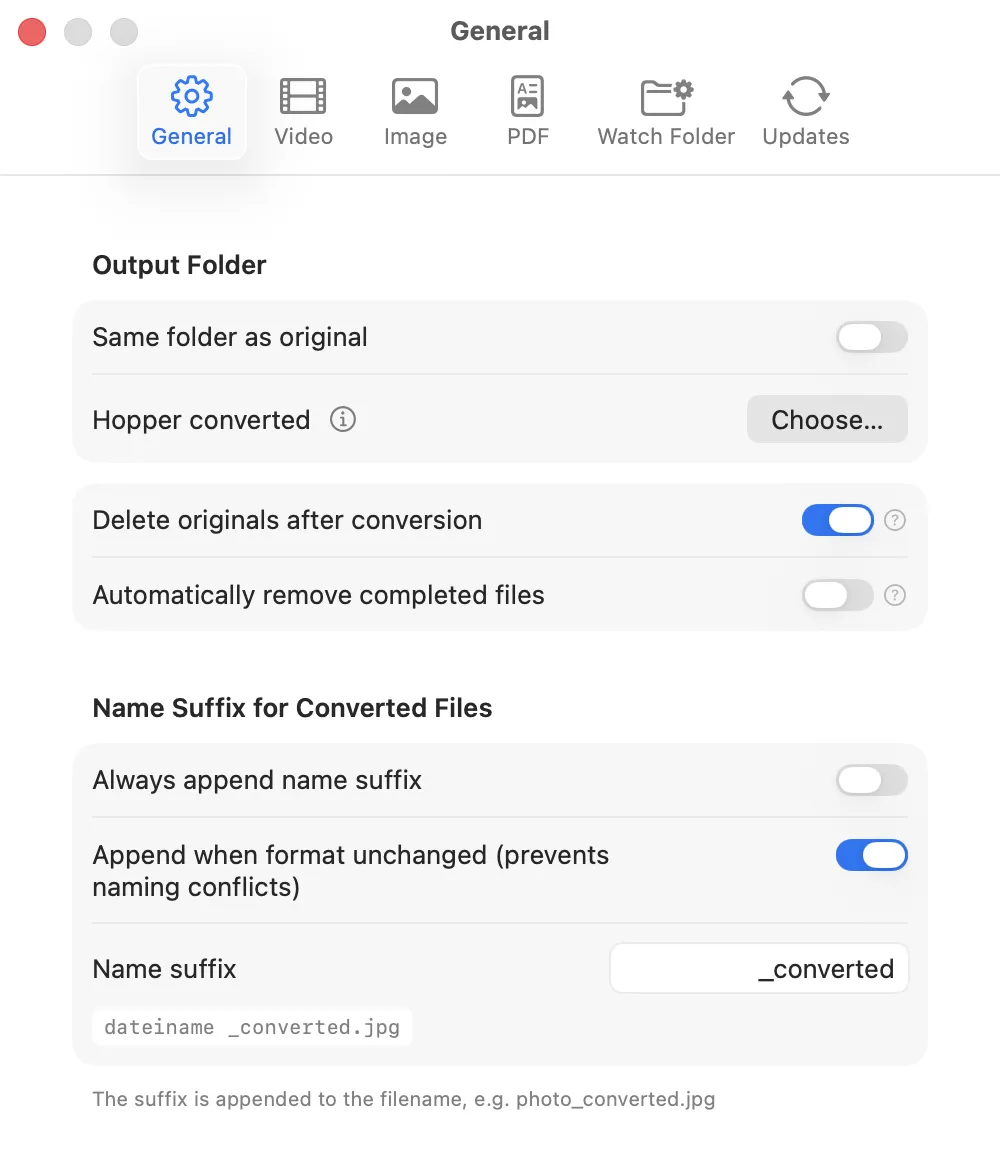
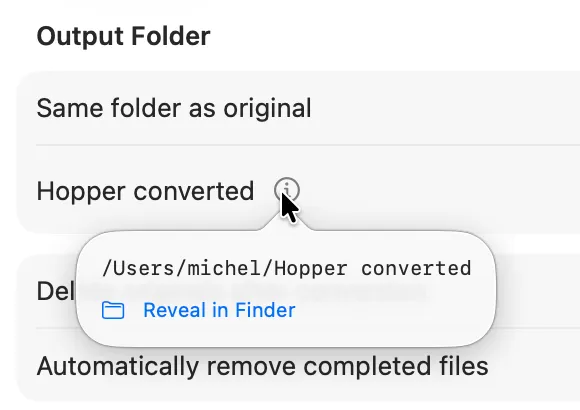
Output Folder
| Same folder as original | Converted files are placed next to the originals. | |
| Custom folder | Fixed destination folder. The ⓘ icon shows the full path on hover. |
You can also switch the output folder directly in the main window – via the dropdown at the bottom left of the status bar, without opening Settings.
Delete originals after conversion
Enables automatic, permanent deletion of the original files after successful conversion.
This feature deletes files permanently without the Trash. Hopper will ask for confirmation before each conversion.
As long as this feature is active, a red notice badge appears above the status bar – clicking it opens this setting directly.
Remove completed files automatically
After a conversion is complete, successfully converted files are automatically removed from the list (not deleted!). Failed files remain visible so they can be re-converted or their errors checked.
Name suffix
Optional text appended to converted files – e.g. photo_converted.jpg.
| Always append suffix | Every converted file gets the suffix | |
| Append when format stays the same | Prevents name conflicts, confusion, and accidental overwriting |
The default suffix is _converted. You can customize it freely, e.g. _web or _small.
Video
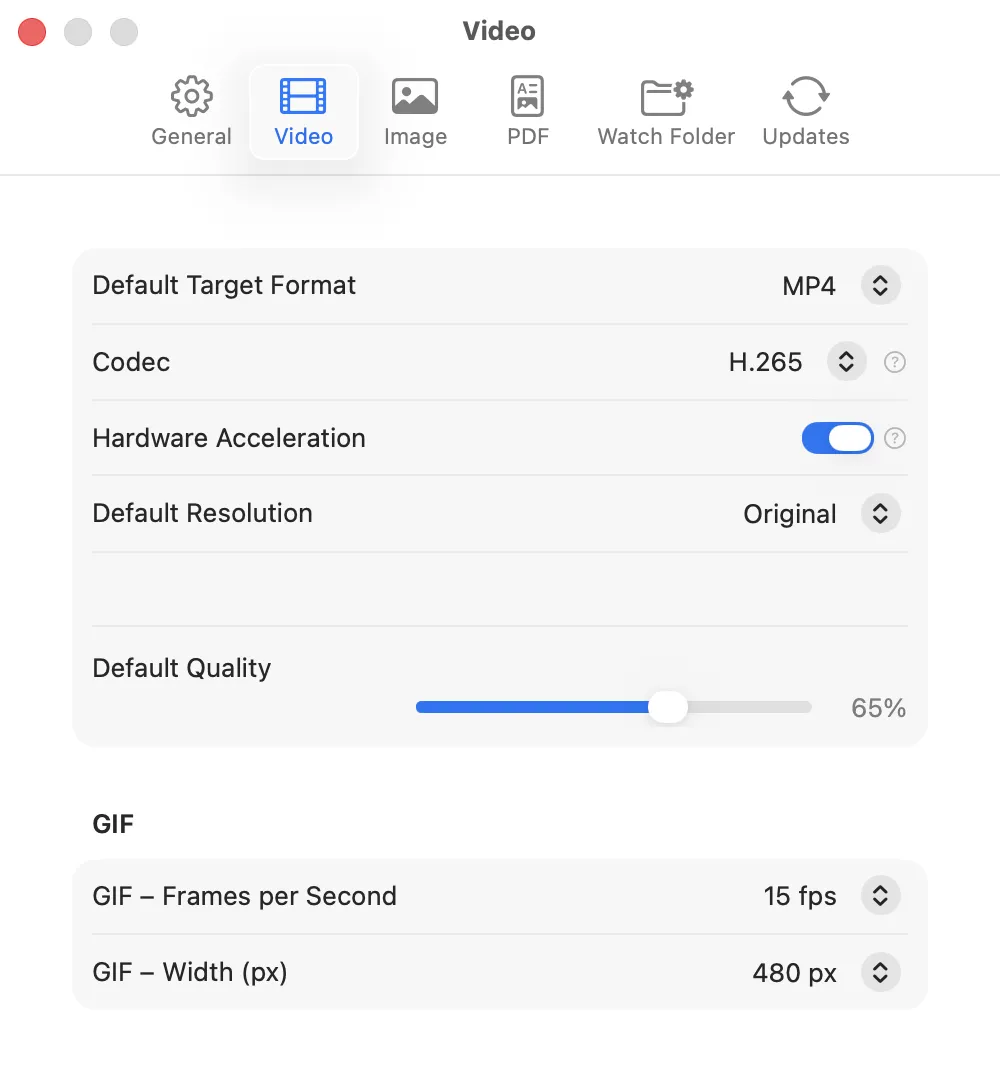
Default Target Format
Hardware Acceleration
Uses Apple's VideoToolbox for fast conversion – several times faster than software encoding. However, for videos with a low bit rate, the result may be larger than with software encoding using CRF. Disable hardware acceleration for maximum compression.
Quality (CRF)
H.264, H.265, and WebM VP9 each have their own quality slider, which appears in the Settings tab once the corresponding codec or target format is selected. 60–75 % is a good starting point. Below 50 %, compression artifacts may appear.
GIF Settings
| Frames per second | Frame rate in the GIF | |
| Width (px) | Target width – height is calculated proportionally |
Image

Default Target Format
Preserve Metadata
EXIF metadata is carried over into the converted file (JPEG and WebP only; AVIF does not support metadata in this version).
Resize
Enables automatic scaling of all images during conversion. The setting applies globally to all images in the list – individual files can be exempted via the checkbox in their respective row.
Mode
| Longest side | Scales the image so that the longer side (whether width or height) does not exceed the specified value. Aspect ratio is preserved. | |
| Width | Scales to a fixed width. | |
| Height | Scales to a fixed height. |
Maximum Size (px)
The target value in pixels for the selected mode.
Only downscale
When this option is active, images that are already smaller than the target value will not be upscaled. Recommended for mixed sets of images with varying source sizes.
An active resize is indicated in the file list by an icon before the format dropdown. As long as “Resize” is active, an orange notice badge also appears above the status bar – clicking it opens this setting directly.
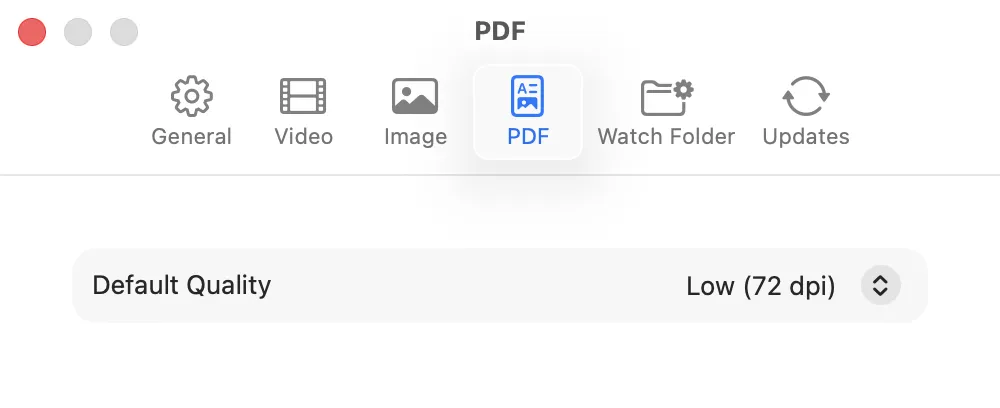
Default Quality
| Low (72 dpi) | Very small file, for screen viewing | |
| Medium (150 dpi) | Good compromise for digital use | |
| High (300 dpi) | Print quality, larger file |
Hopper compresses PDFs by re-rasterizing all pages – ideal for scanned or image-heavy PDFs.
Watch Folder
Hopper can work fully automatically in the background: every file placed in the watched folder is converted immediately – without any manual action.
The conversion settings are taken from the Video, Image, and PDF tabs – configure them before starting.
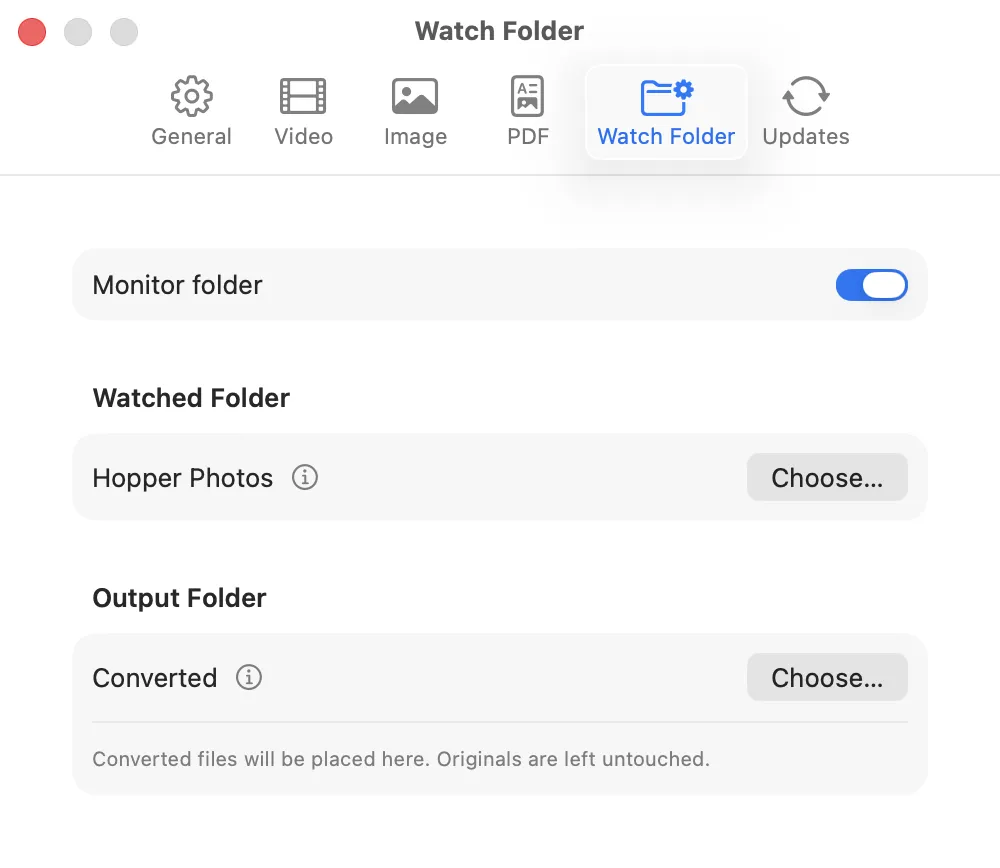
Setup
| Monitor folder | Main switch to enable/disable | |
| Watched folder | The folder Hopper monitors | |
| Output folder | Recommended: a subfolder (e.g. Converted) |
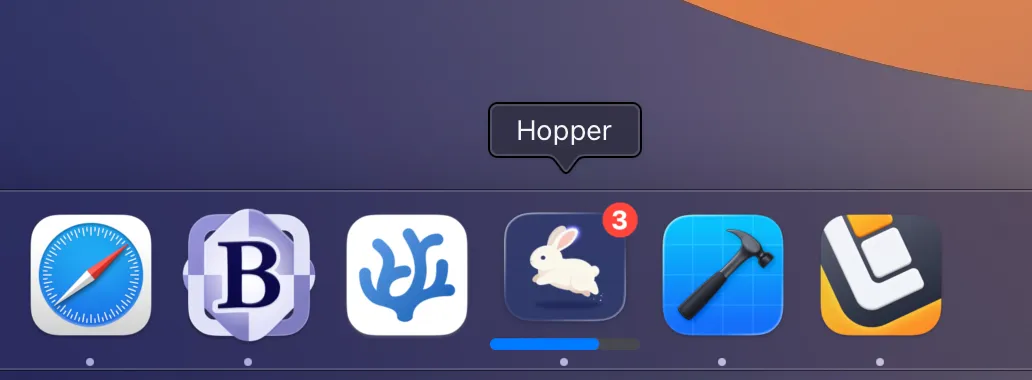
During conversion, the Dock icon shows a progress bar and displays the number of remaining files as a badge. When finished, a macOS notification reports the number of converted files and the space saved.
Hopper automatically moves the original files into a subfolder called Originals – they are not deleted.
If the watched folder and output folder are identical, Hopper warns you – otherwise converted files could be processed again.
Updates
When Check automatically on launch is enabled, Hopper checks for new versions in the background at startup.
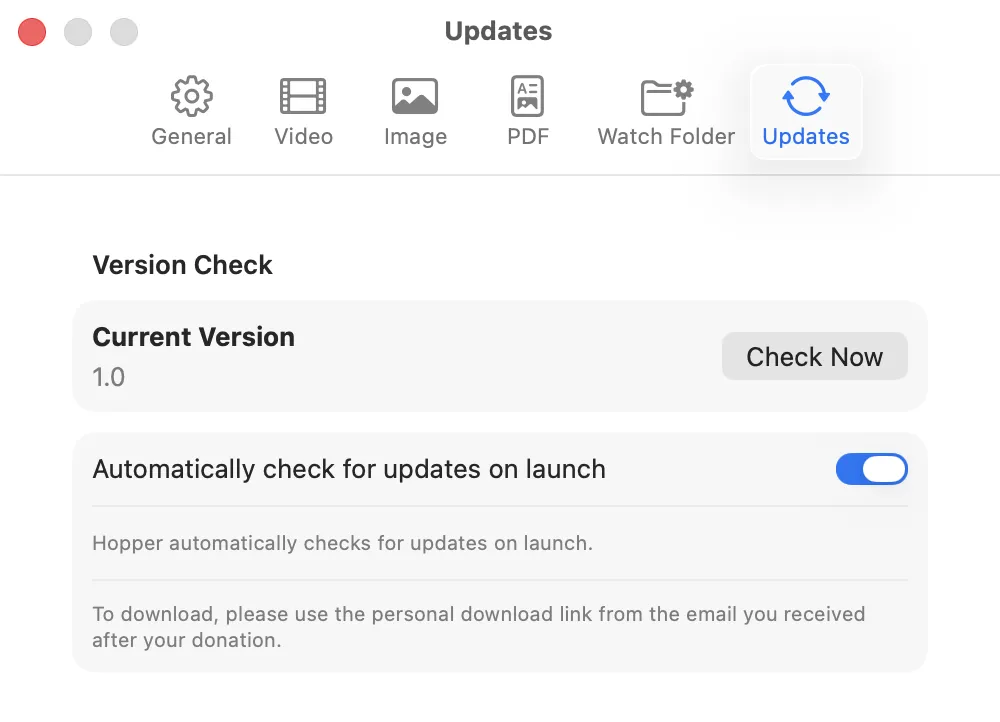
| Skip this version | No more reminders for this version | |
| OK | Close dialog, be reminded later |
Check manually: "Check Now" button
Tips & Tricks
General Tips
| Use ⌘A to select all, ⌘⌫ to remove all. | ||
| Clicking a thumbnail opens a Quick Look preview directly in Hopper. | ||
| Right-click a converted file → Show in Finder to locate it directly. | ||
Path Info
In Settings → General or Watch Folder, hovering over the ⓘ icon next to a folder reveals the full path, and you can open the folder directly in Finder. | ||
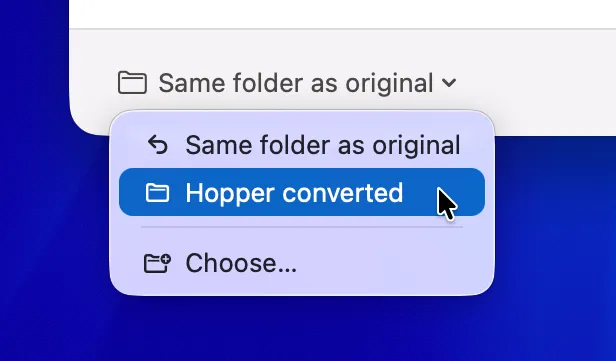
Output folder menu
The output folder menu in the status bar makes it easy to quickly switch between “Same folder as original” and the most recently used output folder. | ||
Video Tips
| Which quality to choose? | 60–75 % is a good starting point. Below 50 %, artifacts become visible. | |
| H.264 or H.265? | H.265 produces smaller files, H.264 is more compatible with older devices. | |
| Hardware acceleration? | If speed matters: yes – several times faster on modern Macs. If maximum compression matters: turn it off. | |
| WebM for web video: | The first choice for web videos – compact, high quality, supported by all modern browsers. |
Image Tips
| WebP, AVIF, or JPEG? | WebP: modern, transparency, small files – however, conversion can take longer at very high resolutions (from approx. 25 MP). AVIF: even better compression, but no transparency and significantly slower to convert. JPEG: universal, no transparency. | |
| Converting HEIC? | HEIC photos from iPhone can easily be converted to JPEG, WebP, or AVIF. However, with 48-megapixel photos, conversion to WebP can take several seconds. Since WebP is primarily designed as a web format, it is only partially suited for very high resolutions. |
Workflow Tips
| Keyboard shortcut for Services: | Assign a custom shortcut for Open in Hopper under Keyboard → Keyboard Shortcuts → Services. Then select files in Finder and open them in Hopper with the shortcut – saves a lot of mouse miles ;) | |
| Watch Folder: | Set it up once and everything runs automatically – using the default settings from Hopper's preferences. |