


DeskMate – Workspaces for Your Desktop
The right files for each context. Automatically.
Frequently Asked Questions | Tips | Download
Sound Familiar?
Your Mac desktop is overflowing with files. Project files mixed with personal documents, old screenshots alongside current downloads. You’re constantly searching and never finding what you need right away..
The Idea
What if your desktop knew exactly what you’re working on?
How It Works
Imagine organizing your desktop files into multiple workspaces – one for each context. For example:
- “Work” shows only your project files
- “Personal” only screenshots and personal documents
- “Browsing” only saved links and browser downloads
- “Presentation” a completely empty desktop for video calls and screen sharing
Switch workspaces – and your desktop shows only what belongs there.
Everything else? Hidden, but not gone.
The Magic: Mission Control Integration
Use Mission Control? Then it gets really elegant: Assign each workspace to a Space.
Switch to your “Work” Space → DeskMate automatically shows your work files
Switch to your “Personal” Space → Only personal content visible
No clicking, no searching. Just switch Spaces – the right workspace is already there.
The Result
- Focus instead of chaos – See only what matters right now
- Work faster – No distraction from irrelevant files
- Clear separation – Keep work and personal life separate
- Professional presentations – Empty desktop at the press of a button for meetings
- Automatically organized – Without manually moving files to folders
DeskMate doesn’t organize your files – it organizes what you see on your desktop.
Getting Started
1. First Launch
Your first workspace shows all current desktop files – your desktop stays exactly as it is.
2. Create new workspaces
Create additional workspaces and name them as you like. Each new workspace starts empty. You decide which files appear there.
3. Assign files and folders
Select files and folders in Finder, press ⌘⇧M (or use the menu command), choose the new workspace. Move or Copy – you decide whether the selection is visible only in the new workspace or also in the previous one.
4. Automatically in flow
New files appear in the active workspace. Deleted files disappear everywhere.
Pay once, use unlimited – no subscription!
- With a one-time purchase price you get full access to DeskMate. You can download the app – including future updates – up to 5 times without additional costs.
- No data collection, no hidden connections.
DeskMate does not collect or transmit any data.
Test DeskMate now free for 7 days: Download demo version
System Requirements
DeskMate is a Universal App for Intel and Apple Silicon Macs and runs on macOS 13.5 and later, including macOS 26 Tahoe. The app was developed in Swift and is 1.2 MB in size.
Current Version: 1.4 (September 3, 2026)
What’s New?
Version 1.4.1
September 22, 2026- New: Drag & Drop Between Workspaces. Files can now be moved between workspaces using drag & drop. When dragging a file on the desktop and switching to a different workspace, the file is automatically assigned to the new workspace and remains visible.
Version 1.4
June 22, 2026- New: Keyboard Shortcuts When Moving Files. The dialog for moving or copying files now supports keyboard shortcuts: Press the corresponding number (1–9) to select the target workspace. Use M or Return to move the files, C to copy them, and ESC to cancel. Cmd+Return moves the files and immediately switches to the target workspace.
- New: Save and Restore Settings. Holding the Option key (⌥) while the menu is open reveals three additional options: Save Settings, Load Settings, and Reset Settings. This makes it easy to back up all workspaces and configurations and restore them whenever needed.
Version 1.3.1
February 2, 2026- New: Workspace Number in Menu Bar. When the workspace name display is disabled, the current workspace number is now shown next to the icon. This helps you keep track of which workspace you’re in, even in compact mode.
Version 1.3
December 15, 2025- New: Clearer terminology. Instead of "virtual desktops," DeskMate now uses the term "workspaces" – this avoids confusion with macOS virtual desktops (Spaces).
Version 1.2
September 26, 2025Version 1.1
September 9, 2025Version 1.0
September 1, 2025- Release of the first version.
Video and Screenshots
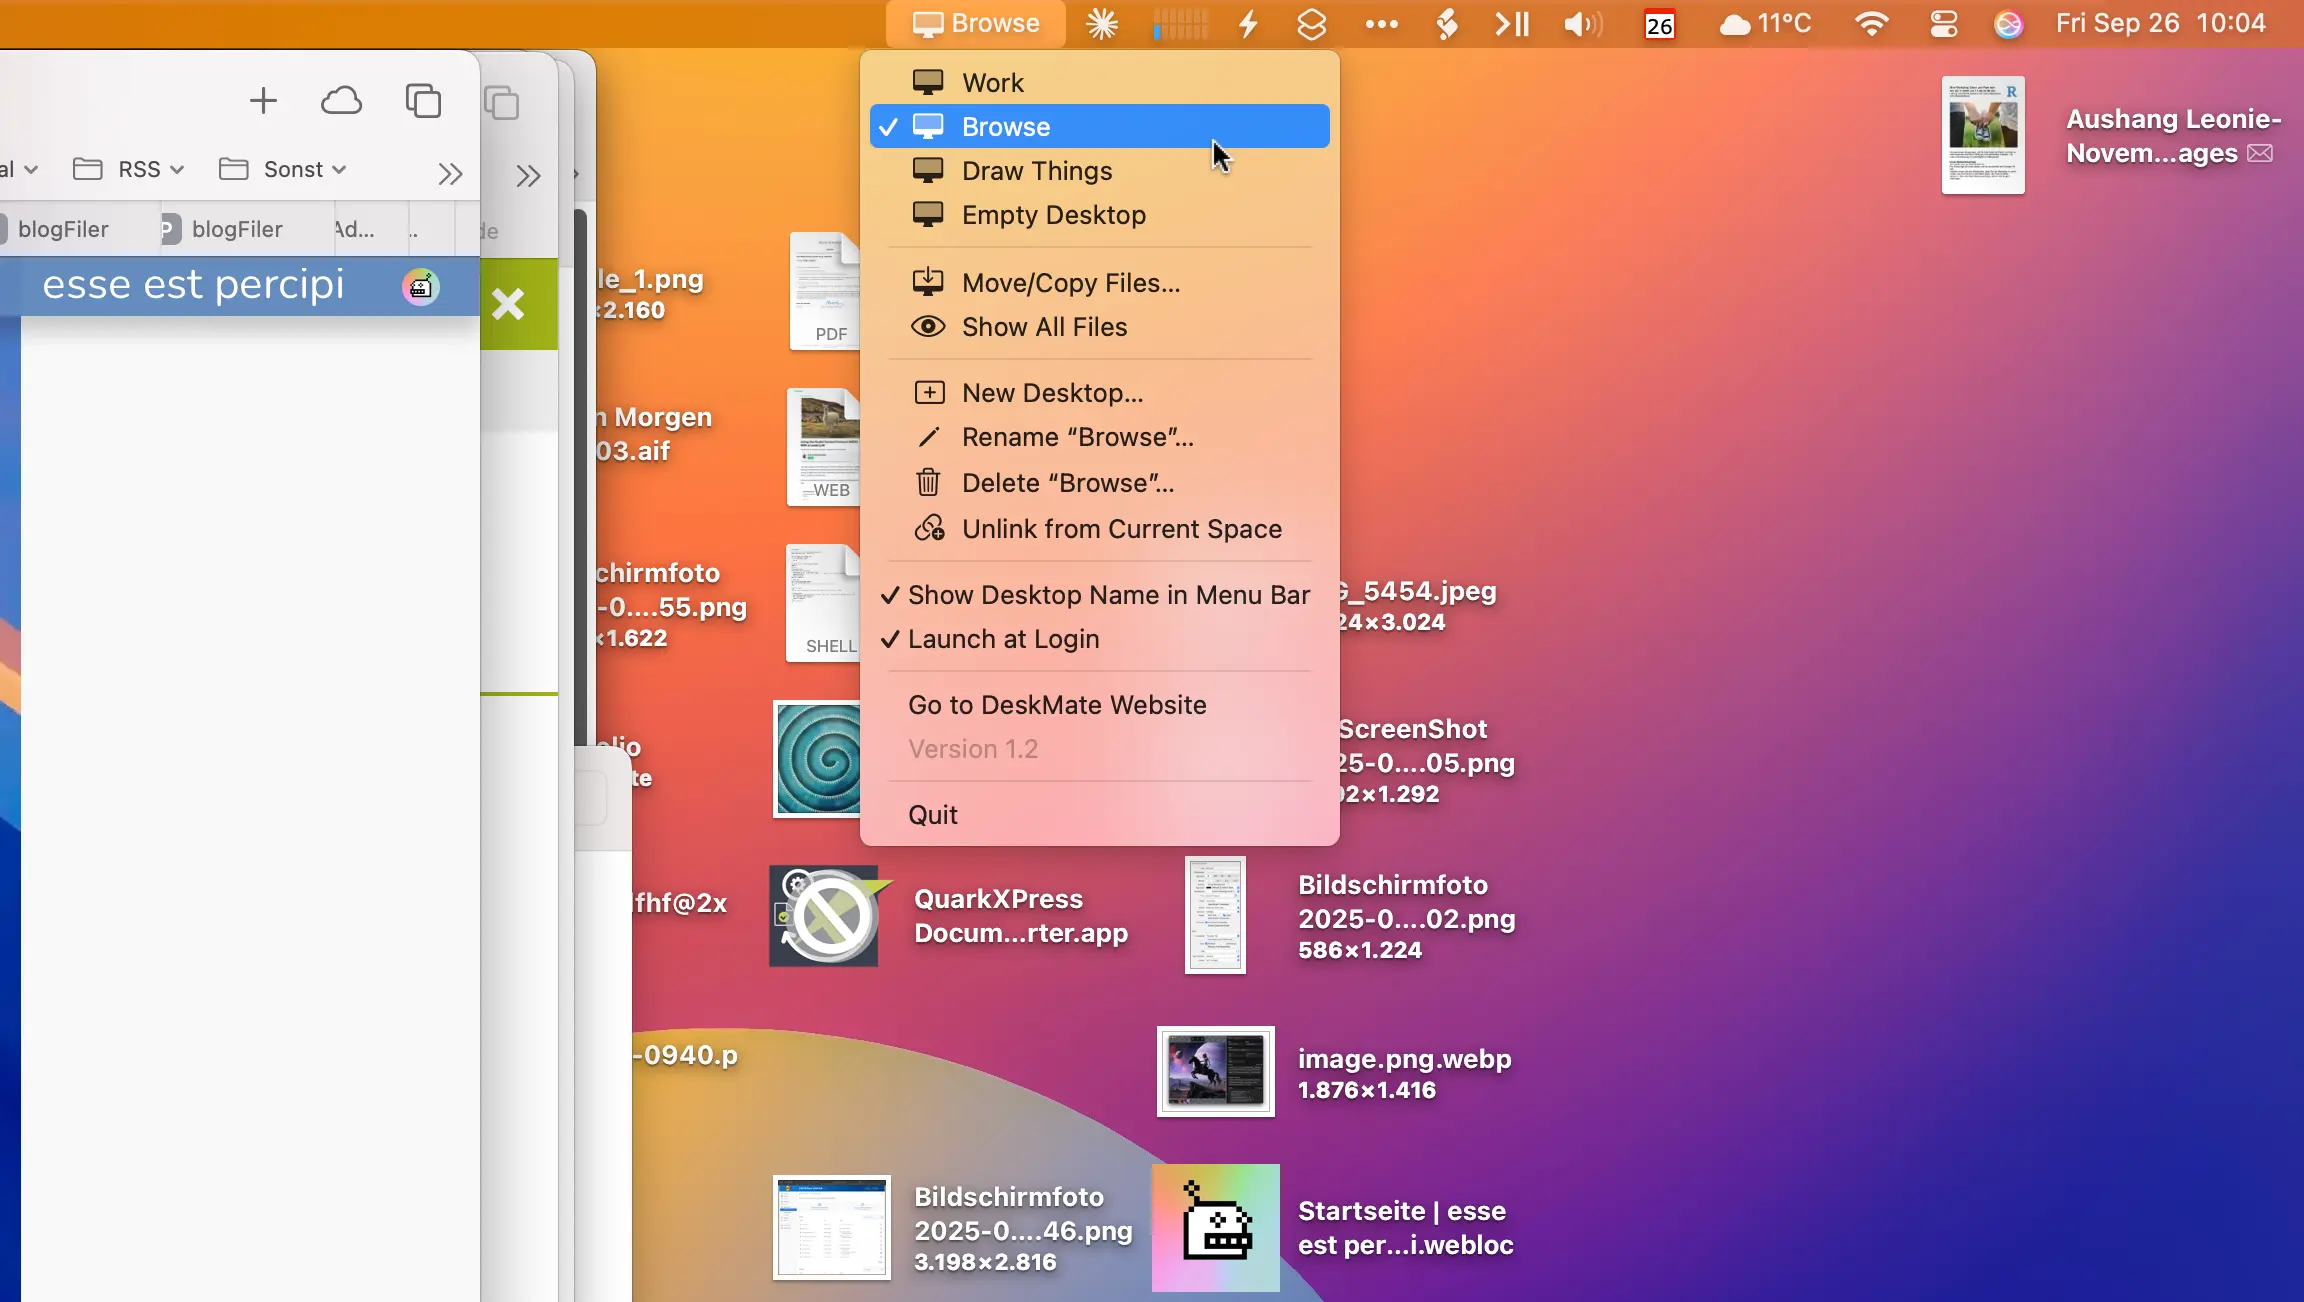
The virtual desktop "Browse" is linked to the Space where Safari is running. When switching to Safari, the "Browse" workspace is therefore automatically selected.
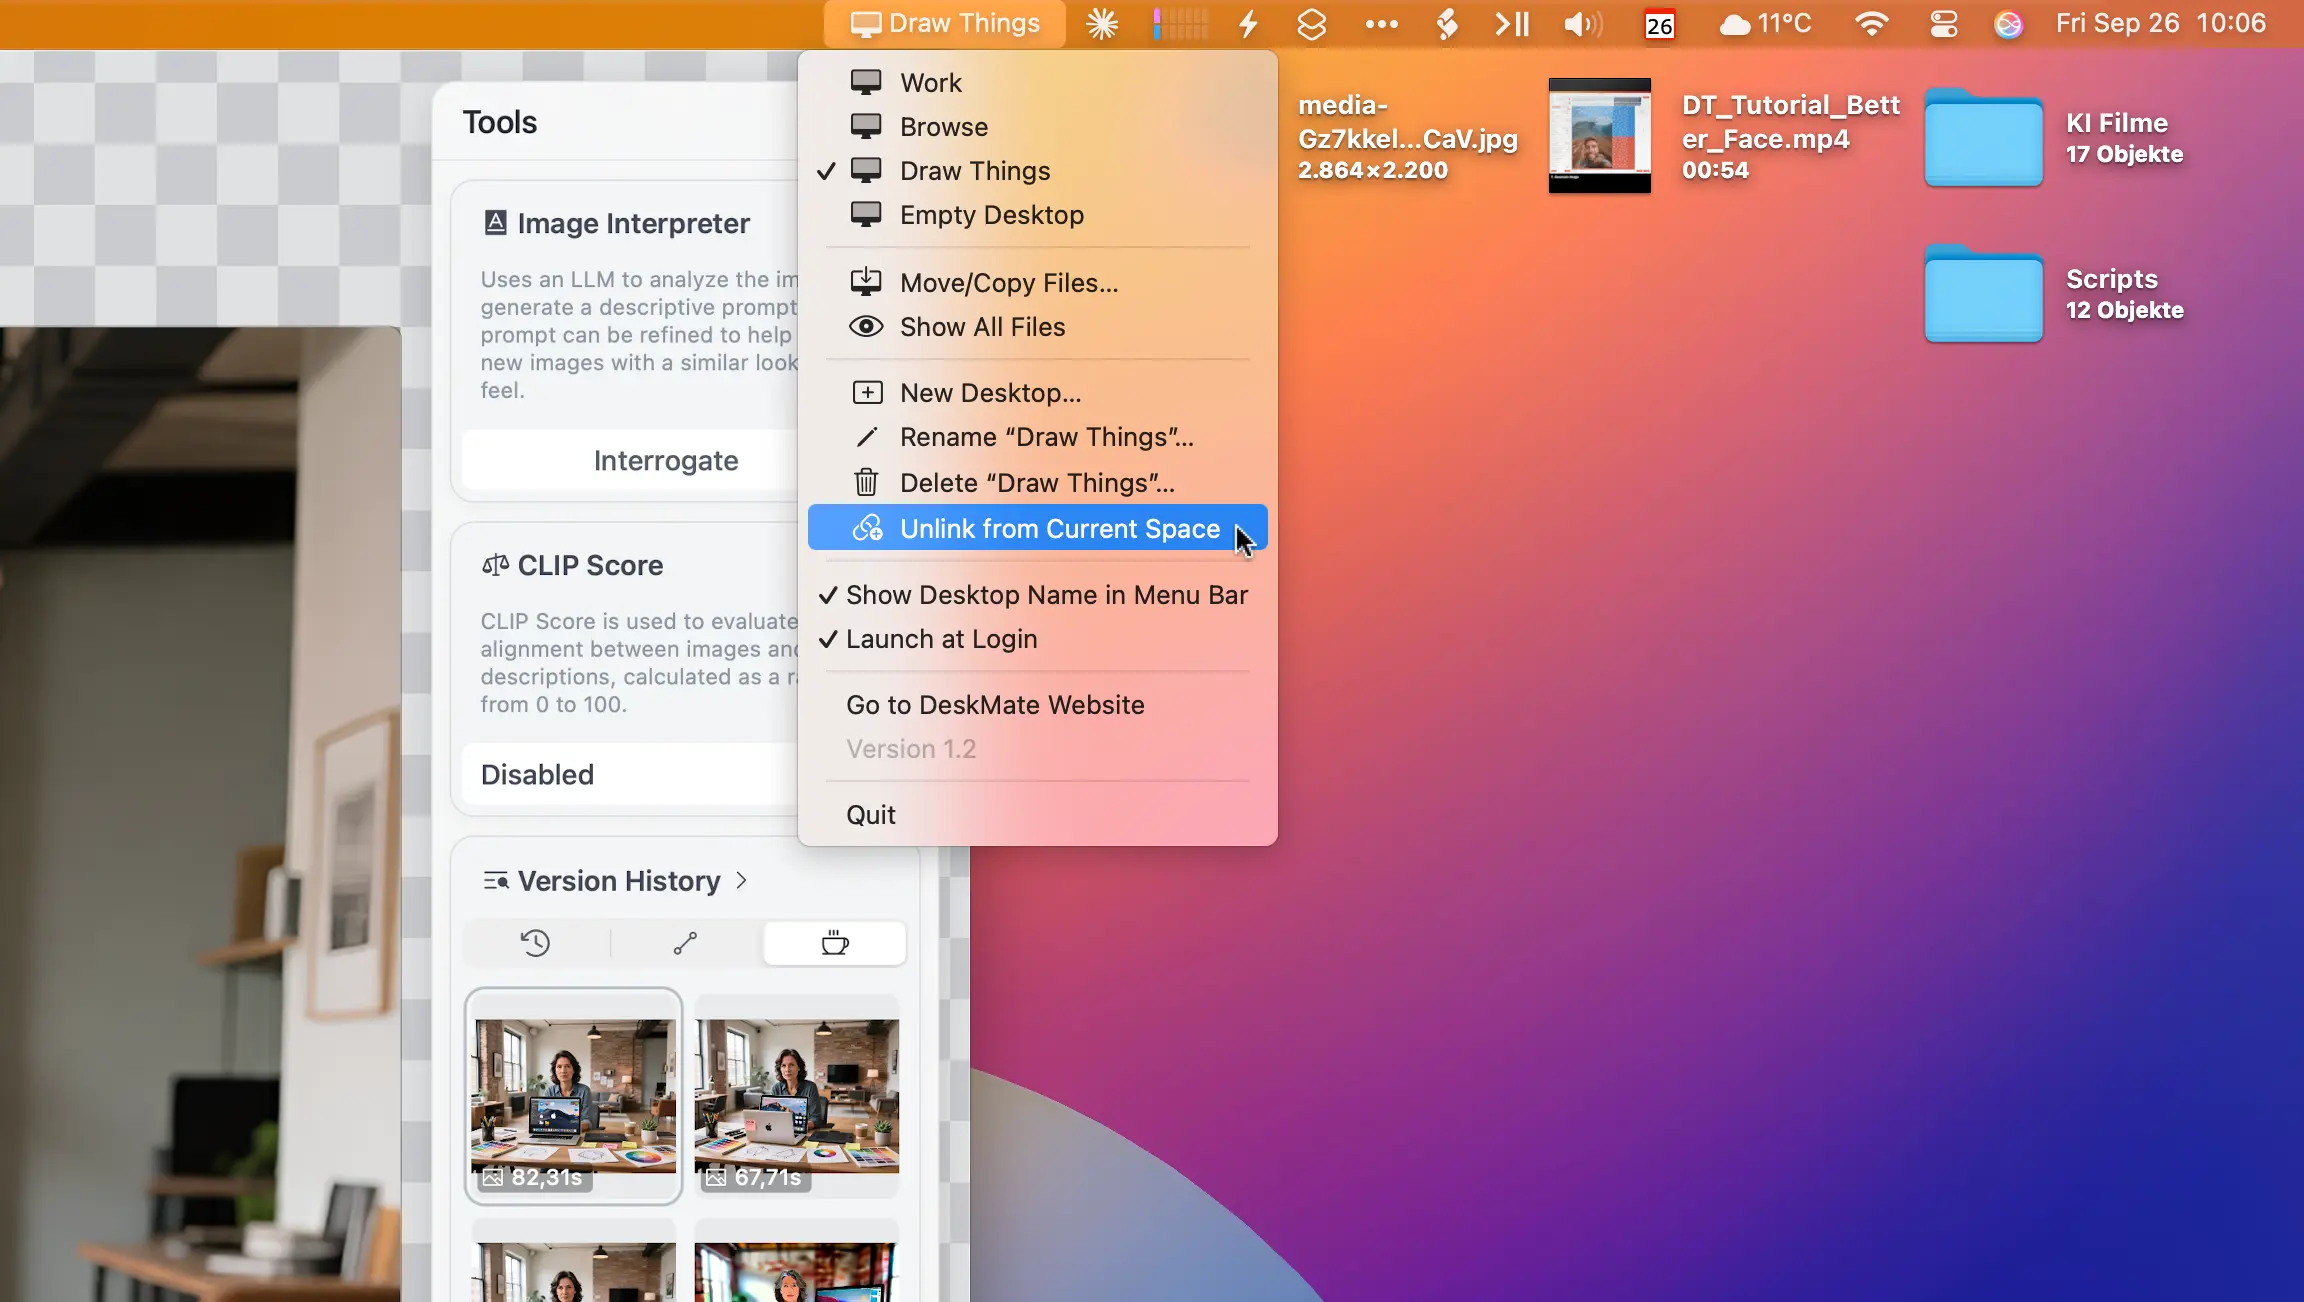
When switching to the Space where the app Draw Things is running, the workspace "Draw Things" is automatically selected due to the link.
Tips for Optimal Use
- Plan workspace structure
Think ahead about a meaningful structure: "Work", "Personal", "Current", "Archive" or project-related names. Thoughtful naming saves time when searching later. However, workspaces can also be renamed at any time and rearranged in the menu (with the ⌥ key pressed). - Start with one workspace
Begin with few workspaces and expand as needed. Too many workspaces can become confusing again. 3-5 workspaces are usually sufficient. - Cleaning up made easy
Use the first workspace as a "collection point" for new downloads and files. Clean up regularly by moving files to the appropriate thematic workspaces. - Use Space links
Space integration is particularly useful for context-based work. Link the "Work" workspace to your main work Space and the "Personal" workspace to a separate Space. - Use keyboard shortcuts
When the desktop has focus, you can use ⌥1 through ⌥9 to quickly switch between the corresponding workspaces. Selected files can also be conveniently moved or copied using ⌘⇧M. In the move and copy dialog, select the target workspace directly using the number keys (1–9), confirm with M or Return, copy with C, and cancel with ESC. Use ⌘Return to move the files and switch to the target workspace at the same time. - Show important files in multiple workspaces
If certain files or folders are relevant in more than one context, you can display them in multiple workspaces using the Move/Copy command (⌘⇧M). Simply choose "Copy." The files stay in their original location and also appear in the target workspace. This way, your key content is always within easy reach, no matter which workspace you’re working in. - "Show all" as backup
Use the "Show all files" function as a backup when you temporarily need to see all files or can’t find a file. - "Empty desktop" for presentations
Create a workspace called "Empty Desktop" without any files. Perfect for presentations, video conferences, screenshots or when you simply need a clean, distraction-free work environment. - Back Up Your Settings
Hold the Option key (⌥) while opening the menu to save or restore your settings. This is especially useful before macOS updates, when migrating to a new Mac, or as a safeguard against accidentally resetting all your workspaces and their configurations.
Coffee Fund
If you donate 8.99 euros (or more) to the coffee fund, you will receive an email with a download link for the Apple-notarized "DeskMate.app" (Version 1.4 from September 3, 2026).
And here’s how it continues:
After completing payment via PayPal, you will receive an email to your PayPal address within a few minutes. This contains a personalized download link through which you can download "DeskMate.app" up to five times.
You can also test DeskMate for 7 days with all functions for free beforehand: Download demo version
Frequently Asked Questions
General
Is there a trial version?
Yes, you can test DeskMate free for 7 days. The demo version offers full functionality without restrictions.
How many workspaces can I create?
Practically unlimited. However, we recommend 3-5 workspaces for optimal clarity.
Does DeskMate start automatically with macOS?
You can optionally set DeskMate to start automatically at login. This can be activated in the menu options.
Does DeskMate consume a lot of system resources?
DeskMate is programmed to be very resource-efficient and runs as a lean background service. Memory usage is minimal and CPU load is practically unmeasurable.
Features & Usage
Can I change the order of workspaces in the menu?
Yes. If you open the menu while holding the Option key (⌥), the workspace entries appear with additional options, e.g., "Rearrange Workspace 3...". You can use this to move the respective workspace to the desired position.
Can I display a file in multiple workspaces at the same time?
Yes, that’s possible. Use the "Copy" option when moving files (⌘⇧M). The file will then remain in the original workspace and also appear in the target workspace.
Are my files really moved or deleted?
No. DeskMate never moves or deletes your files. It only makes them visible or invisible, depending on which workspace is active. Your files remain physically in the same location in Finder.
Can I accidentally "lose" files?
No. In an emergency, use the "Show all files" function in the DeskMate menu. This will temporarily display all files from all workspaces.
Installation & Uninstallation
Why does DeskMate require so many permissions?
DeskMate needs various permissions for its core functions:
Desktop folder access: DeskMate manages files on your desktop by making them visible or invisible. Without access to the desktop folder, the app cannot perform its main function.
Accessibility: This permission enables the global keyboard shortcuts ⌥1 to ⌥9 for quick workspace switching and ⌘⇧M for "moving" files. Without this permission, only the menu functions work.
Apple Events: DeskMate communicates with Finder to update desktop changes and refresh the display. This ensures that changes are immediately visible.
Notifications: For discreet notifications when switching workspaces or moving files, without interrupting your workflow.
Important: DeskMate never moves or deletes your files. It only changes their visibility. All files remain physically in their original location. Upon uninstallation, all files automatically become visible again.
These permissions are necessary for a desktop management app and are used exclusively for the advertised functions. DeskMate does not collect any data and does not communicate with external servers.
What happens when I uninstall DeskMate?
When DeskMate quits, all files are automatically made visible again. Your desktop returns to its original state, as if DeskMate had never been installed. You can simply delete DeskMate at any time.
Problems & Solutions
DeskMate asks for accessibility access every time it starts, even though permission has already been granted. What can I do?
This problem occurs when macOS doesn’t correctly recognize the app signature. The solution is simple:
Open System Settings: Go to System Settings > Privacy & Security > Accessibility
Remove DeskMate: Select DeskMate from the list and click the minus button (-) to delete the entry
Launch DeskMate: Start DeskMate again. The system will ask you for permission
Grant permission: Set the toggle to green and confirm the permission
Restart the app: Quit DeskMate and launch it again
After this one-time procedure, DeskMate should correctly recognize the permission and no longer ask for it. The keyboard shortcuts ⌥1 to ⌥9 as well as ⌘⇧M will then work as intended.
Spaces integration is not working – Workspace links are not automatically activated when switching between Spaces. What can I do?
This issue occurs when the macOS Spaces configuration on your system is corrupted. The solution is to reset the Spaces settings:
Open Terminal: Applications > Utilities > Terminal
Delete Spaces configuration: Enter the following command and press Return:
defaults delete com.apple.spaces
Restart your Mac: A full restart is required.
Recreate your Spaces: Open Mission Control and set up the desired Spaces.
Launch DeskMate: Recreate your Space–Workspace links.
After this one-time reset, automatic detection should work reliably again. The linked workspaces will then be selected automatically whenever you switch between Spaces.
I donated to the coffee fund but didn’t receive the email with the download link, why not?
Sometimes it takes a few minutes for PayPal to fully process the payment. Only then is the email sent to your email address registered with PayPal. Please be sure to check your spam or junk folder and especially the email account you used to register with PayPal. Please also make sure your mailbox isn’t full, as your account won’t accept any more emails then. If none of this applies and you still haven’t received the email after 15-30 minutes, it might be because you donated less than 8.99 euros to the coffee fund.
More Apps

MetaData.app

Wann war das.app

Designers Toolbox.app